...
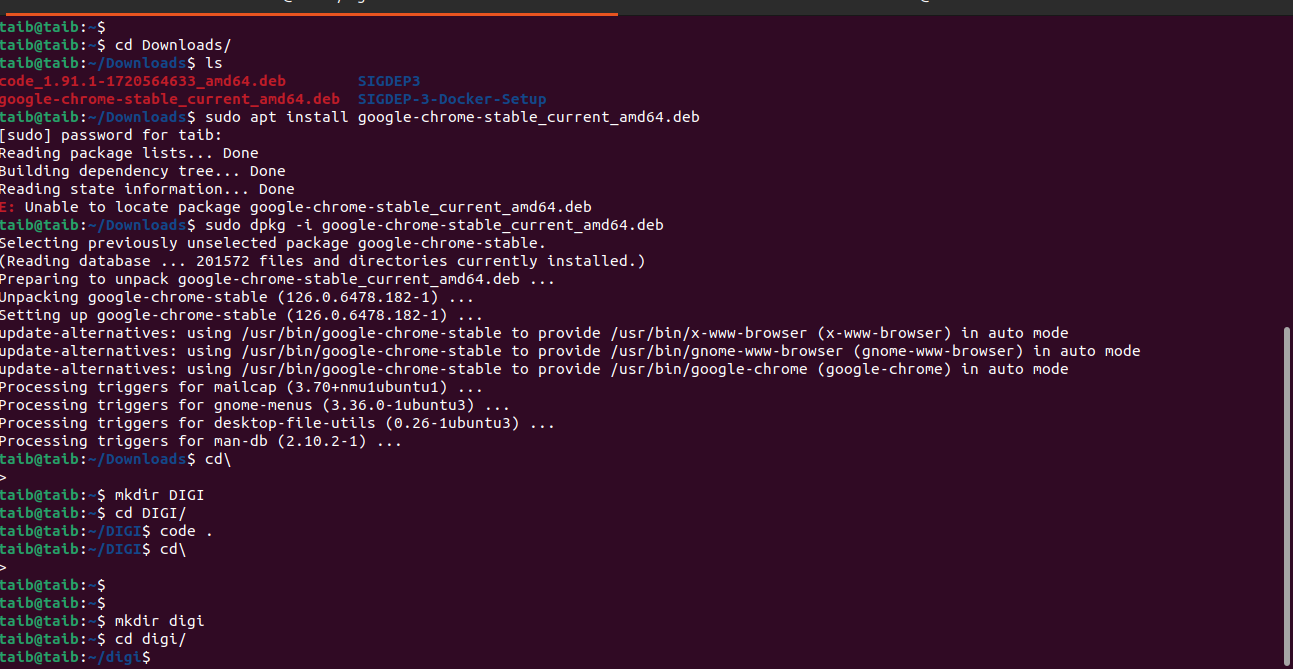
To get started with setting up the project locally, create a directory for the project on your local machine and change directory to the created project.
...
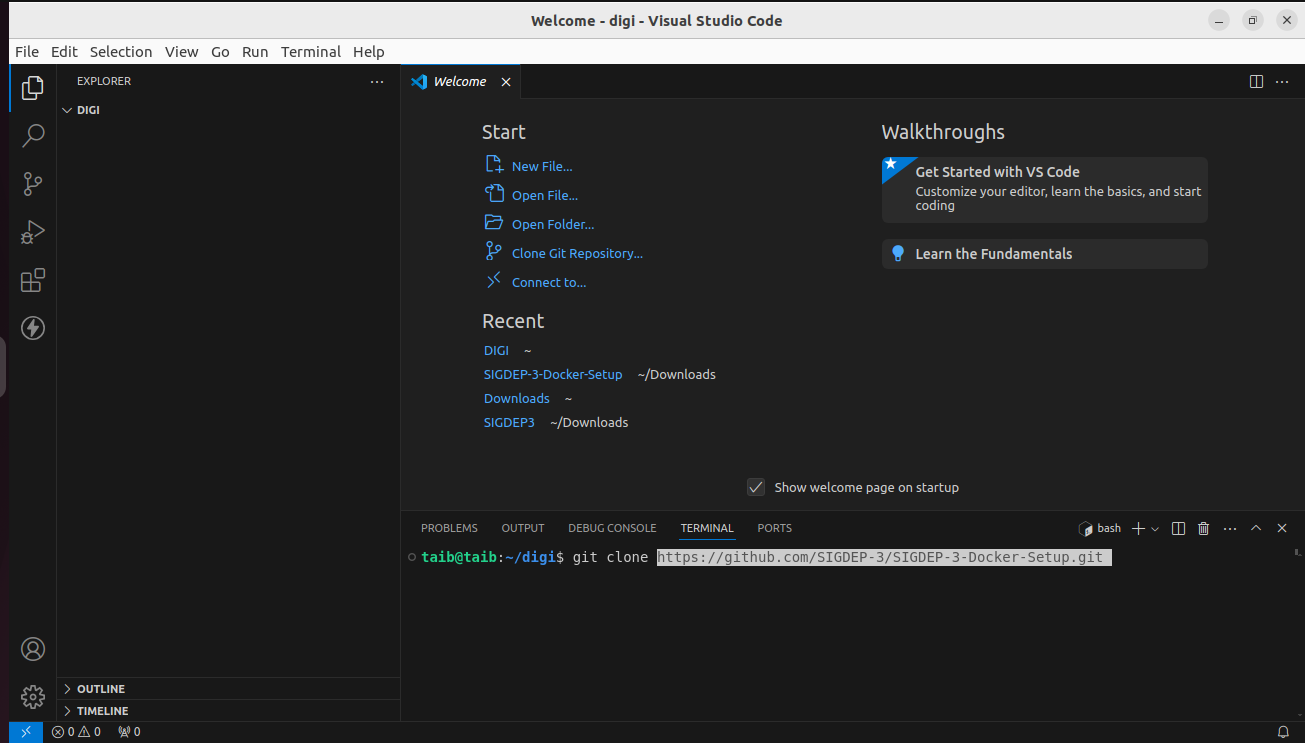
Open the visual studio code in the project directory
...
Navigate to the project GitHub repository and click on SIGDEP-3/SIGDEP-3-Docker-Setup
...
Copy the project url to clipboard
...
On visual studio, clone the project in your project folder using the command; git clone https://github.com/SIGDEP-3/SIGDEP-3-Docker-Setup.git
...
Upon successful cloning of the project, change the directory into the project using the command; cd SIGDEP-3-Docker-Setup/
...
Change directory into cloned project folder
...
Click on the docker-docker-local-pilopilot.yml file
...
Note: The following services are setup in the docker-docker-local-pilopilot.yml file.
The Sigdep3 service displays the configuration for the OpenMRS
...
Sigdep3 service
The Sigdep3 db represents the database service for the OpenMRS instance
...
...
The OPENHIM- Interoperability layer (IOL)service is configured for the Mongo database, OpenHIM console and OpenHIM core respectively.
...
The pipeline-controller is configured for FHIR analytics.
...
At this juncture spin up the project by executing startup the project by running the command; sudo docker compose -f docker-compose-local-1.yml up. The project will be started successfully.
...
...
HOW TO STARTUP THE SIGDEP3 EMR LOCALLY
...
Upon successfully spinning up the project locally, the next step is to spin up the OpenMRS instance locally. Open a new terminal and startup the SIGDEP3 instance by executing the command sudo docker compose -f docker-compose-local-pilot.yml up sigdep3 sigdep-db. The SIGDEP3 instance will be started.
...
...
Click on the README.md file to open.
...
Open a new terminal and execute the commands git lfs fetch,git lfs checkout and git lfs pull respectively
...
Note: You might encounter the system initializing the database setup before the login page is displayed. Please be patient this may take a few minutes to complete.
...
Initial setup
...
SIGDEP-3 login page
Login to the instance. The default username and password are admin | Admin123.
...
Upon successful login click on Administration.
...
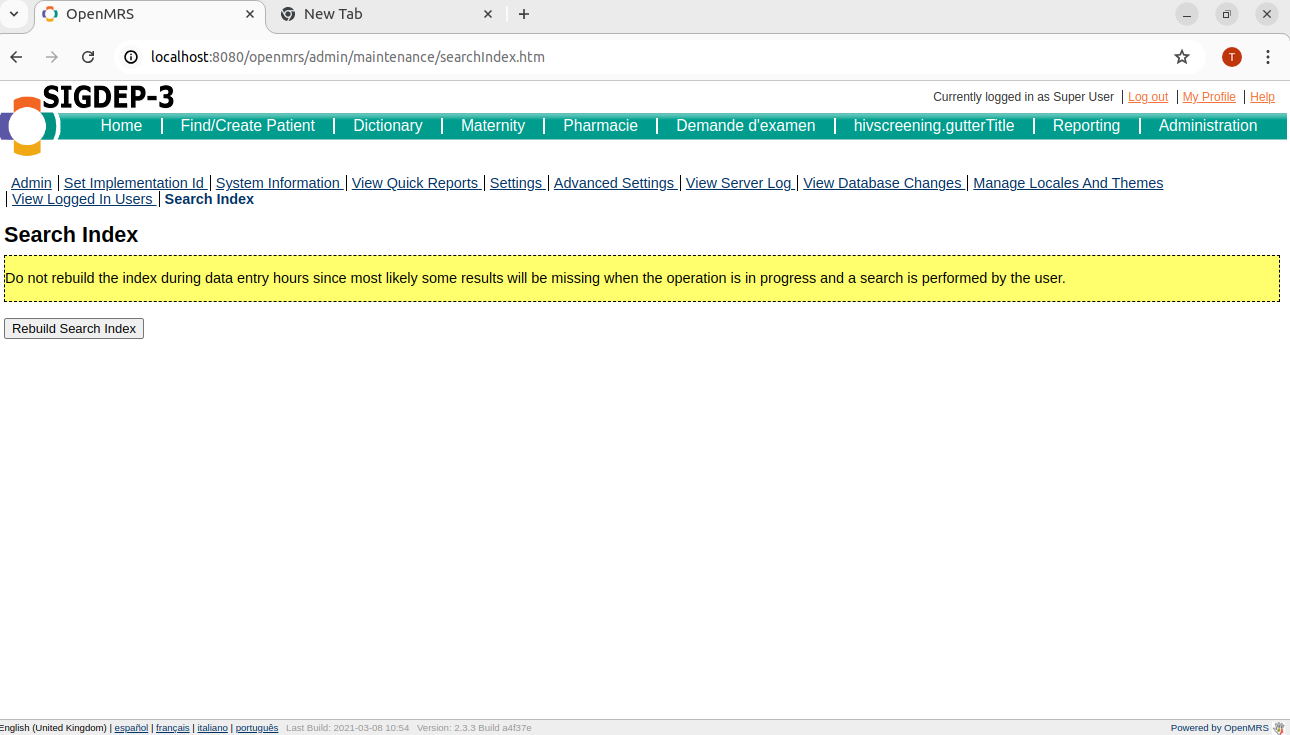
At this juncture, the search index should be rebuilt. Click on Search Index under Maintenance.
Note: The search index must be rebuilt in order for the instance to execute any search for . For instance, searching the concept dictionary or searching for a patient.
...
Click
...
Click on the Rebuild Search Index button.
...
Note: The server-side will execute the search index rebuild
...
Server-side search index rebuildNote: Upon the completion of the search index the search index rebuilding, a notification will be displayed
...
Search index rebuild completedNote: A search in the dictionary will return the respective result(s). The illustration below shows a CD4 concept search.
...
...
HOW TO STARTUP THE OPENHIM-IOL
The OpenHIM Interoperability layer service is started by during the initial spinning up of the project.
...
To access the OpenHIM instance, enter the url http://localhost:9000/ on your browser. The Console heartbeat will be displayed. The login page is displayed
Ideally, you should enter the login credentials to proceed. However, this is a new installation. Notice the self signed certificate error message.
...
Click on the link text field.
...
Click on the Advanced button.
...
Click
...
Click on proceed to localhost (unsafe)
...
Note: Upon clicking on proceed to localhost, the OpenHIM console Heartbeat is displayed.
...
Click on the previous tab on the browser. Log on to the instance by entering the credentials; username: root@openhim.org and password: OpenHIM and clicking on the Login button
...
...
Upon successful login click on Transactions. The There are no transactions for the current filters message is displayed.
...
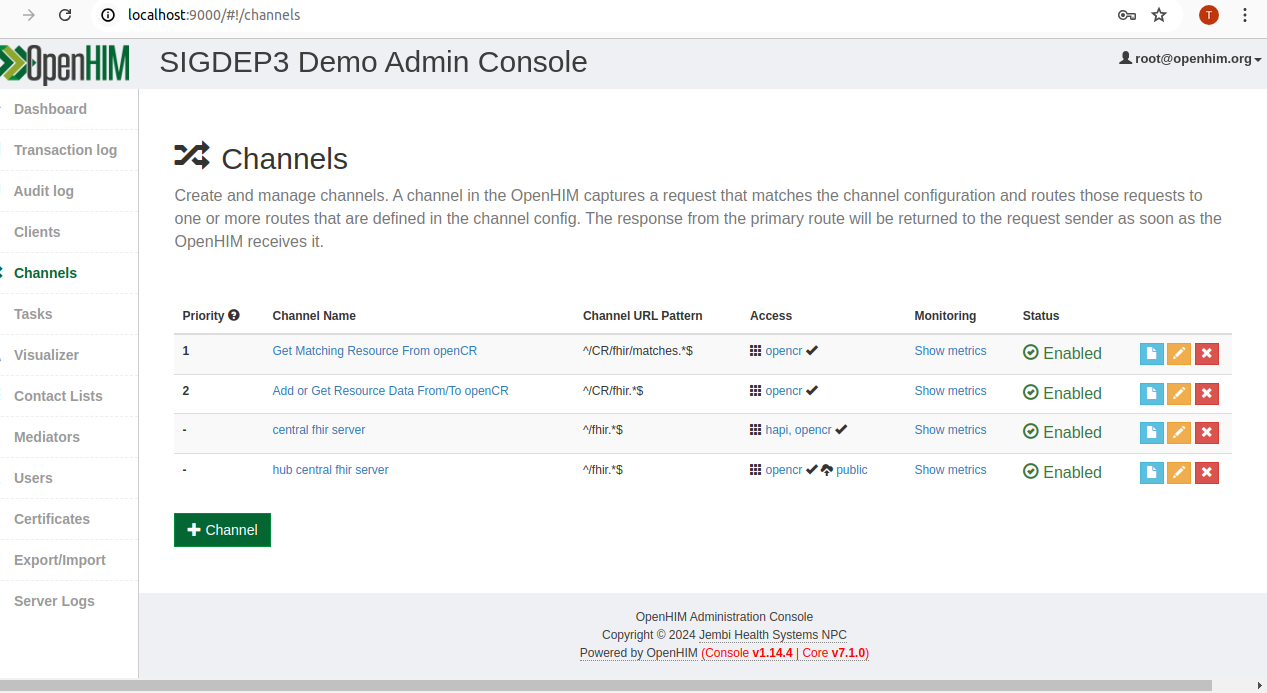
Click on Channels. The client registry channels are displayed as well as the central FHIR server channel.
...
Click on the central FHIR server channel.
...
Note: Upon clicking on the channel, the basic info tab is displayed. This tab displays the information about the channel. For instance, the name, description of what the channel does as well as the methods.
...
...
Click on the Request Matching tab. The url pattern for matching the channel is displayed as well as the clients.
...
Click on the Route tab. The central fhir server configuration is displayed.
...
Click on the pencil configuration to view the configuration. The route name, host, port, route path, route path transform, basic authentication username and basic authentication password are displayed.
...
Note: These configurations are set on the project under the local-test-openhim-config.json file as illustrated below.
...
local-test-openhim-config.json file
...
HOW TO STARTUP THE DATA PIPELINE
To startup the data pipeline, open a new terminal and execute the command: sudo docker -f docker-compose-pilot.yml up pipeline-controller
...
Type the url http://localhost:8090/ on your browser. Upon a successful pipeline startup, the FHIR Pipelines Control Panel is displayed.
...
patient,Encounter,Observation,Condition,Practitioner,Location,MedicationRequest
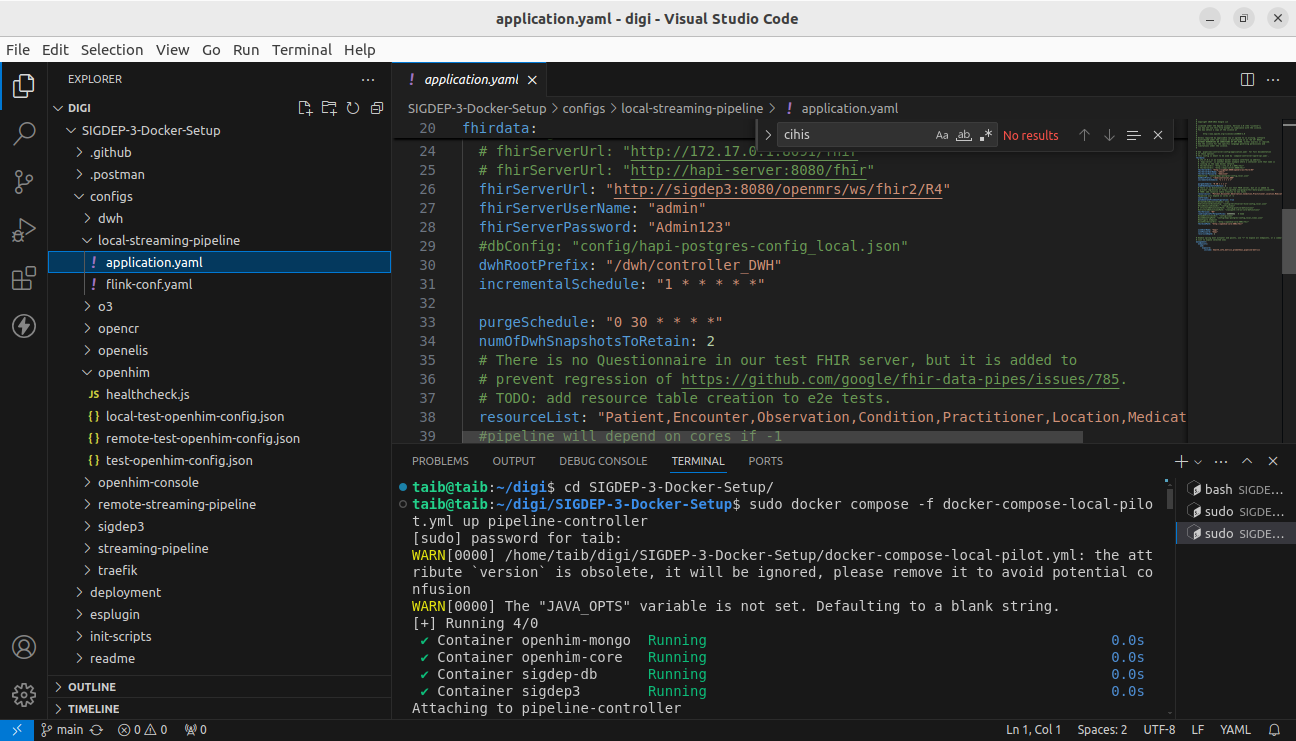
Local streaming pipeline application.yaml file
...
HOW TO SEND A NEW PATIENT RESOURCES TO THE CENTRAL FHIR SERVER
...
To get started, Login to the instance. The default username and password are admin | Admin123.
...
Click on the Find/Create Patient menu item
...
Create a new person by filling the person name, birthdate, gender and click on the Create Person button.
...
Create person
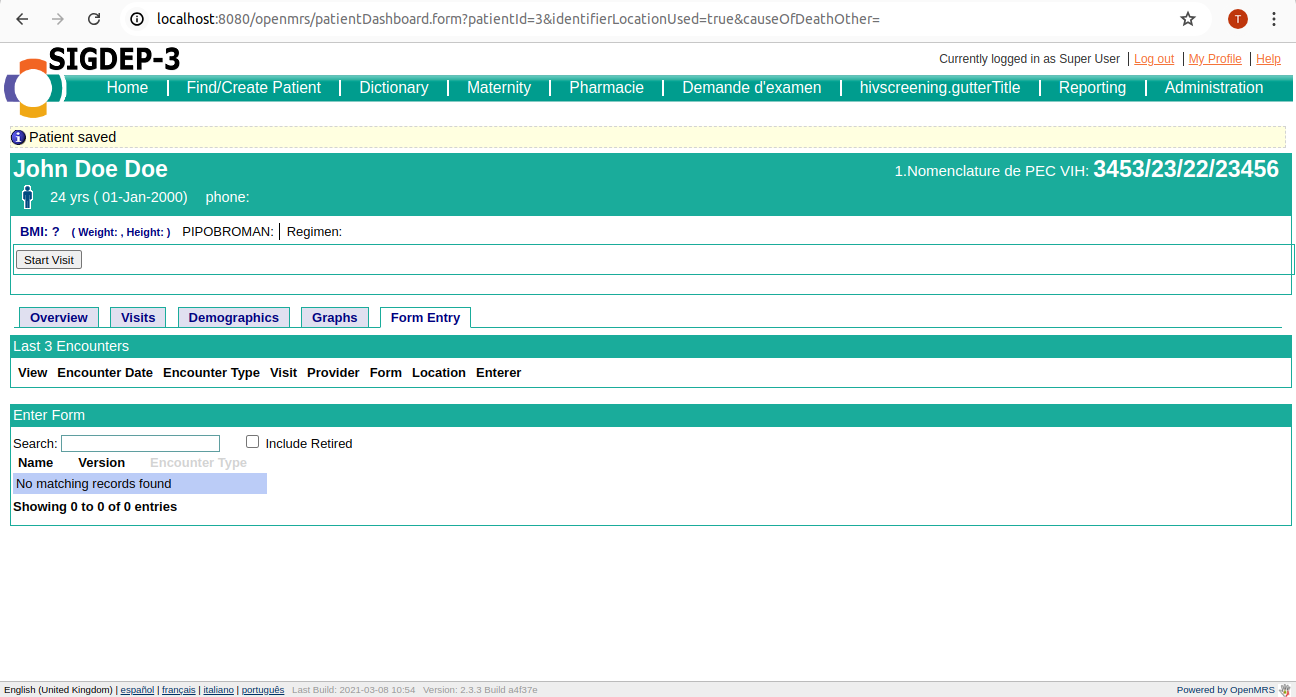
Fill in the middle name, family name, the ID Number and click on the Save button. The patient dashboard is displayed.
...
...
Create a new patient
...
Execute an incremental run on the local pipeline controller by clicking on the Run Incremental button
...
Log on to the OpenHIM local instance using the credentials;
username: root@openhim.org
password: openhim
and click on the Login button
...
Note: Upon login, the transaction log of the local instance displays the POST transaction to the remote HAPI FHIR Server
...
Log on to the remote instance by entering the credentials; username: root@openhim.org and password: OpenHIM and clicking on the Login button
...
Login pageNote: Upon login, the transaction log of the local instance displays the POST transaction to the remote HAPI FHIR Server
...
Remote OpenHIM console transaction logNote: At this juncture, the pipeline is executed
...
...
Access the FHIR consolidated server by typing the url: https://test1.cihis.org/fhir/
...
Filter the resource type by Patient to view the resources
...
Filter the patient resource by lastUpdated to view the newly created patient Jane Doe on the Hapi FHIR server.
...
Patient resource
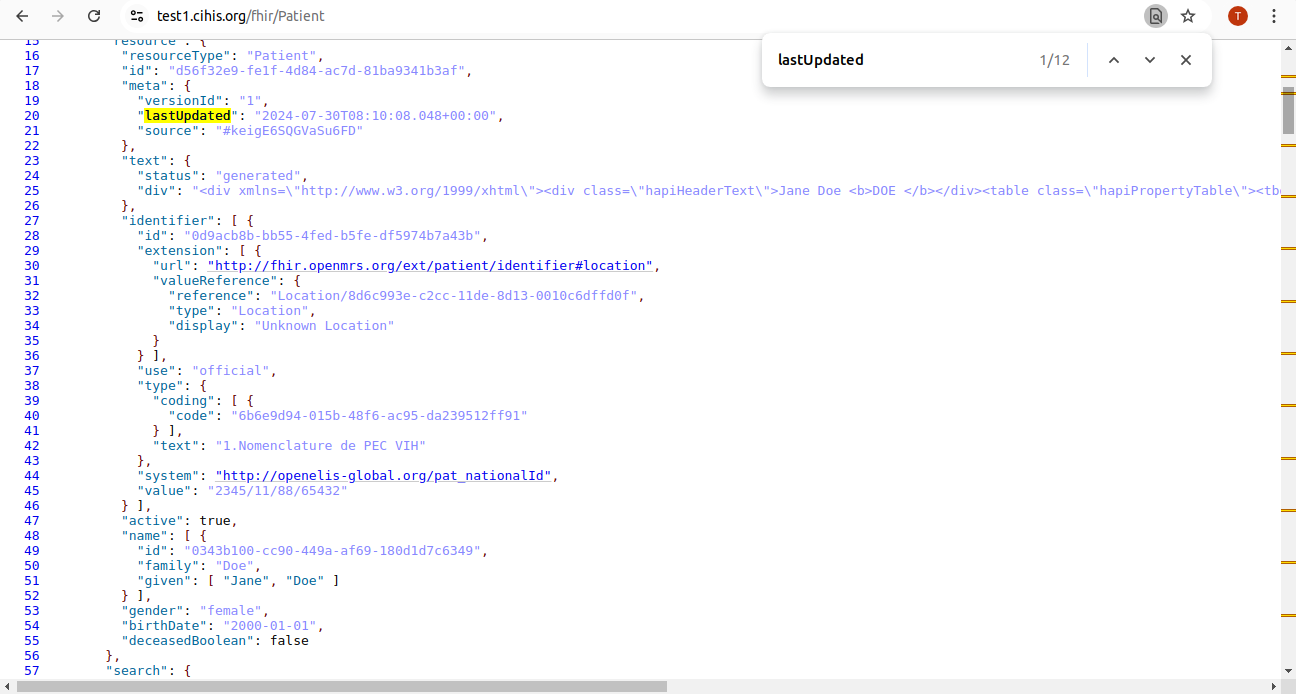
Patient resources
...
HOW TO SEND A LABORATORY ENCOUNTER RESOURCES TO THE CENTRAL FHIR SERVER
...
Log on to the OpenHIM local instance using the credentials;
username: root@openhim.org
password: openhim
and click on the Login button
...