This documentation will guide you how to Submit a Feedback in the new version of General Feedback Mechanism.
Just for example suppose you got a problem while creating a new patient?
...
You have no idea what you need to do in that occasion. So you can just submit
...
your problem as a Feedback to the OpenMRS system. So it will reach the responsible person who will look into it in a later time.
| Info |
|---|
You can refer the step by step guide below or just watch this DEMO Videohttp://youtu.be/LYs5aNuo3PU on Youtube to get started how's new Feedback mechanism works! |
In this new version of feedback system the user can direct their feedback to a particular person rather than sending it to the sane same Admin. in case if there is more responsible person you can direct the feedback to him/her. (eg: site engineer)
...
Okay lets start filling our feedback form! In our new System we have separated the form into a step by step wizard so we think now its easy and quick to fill out the data.
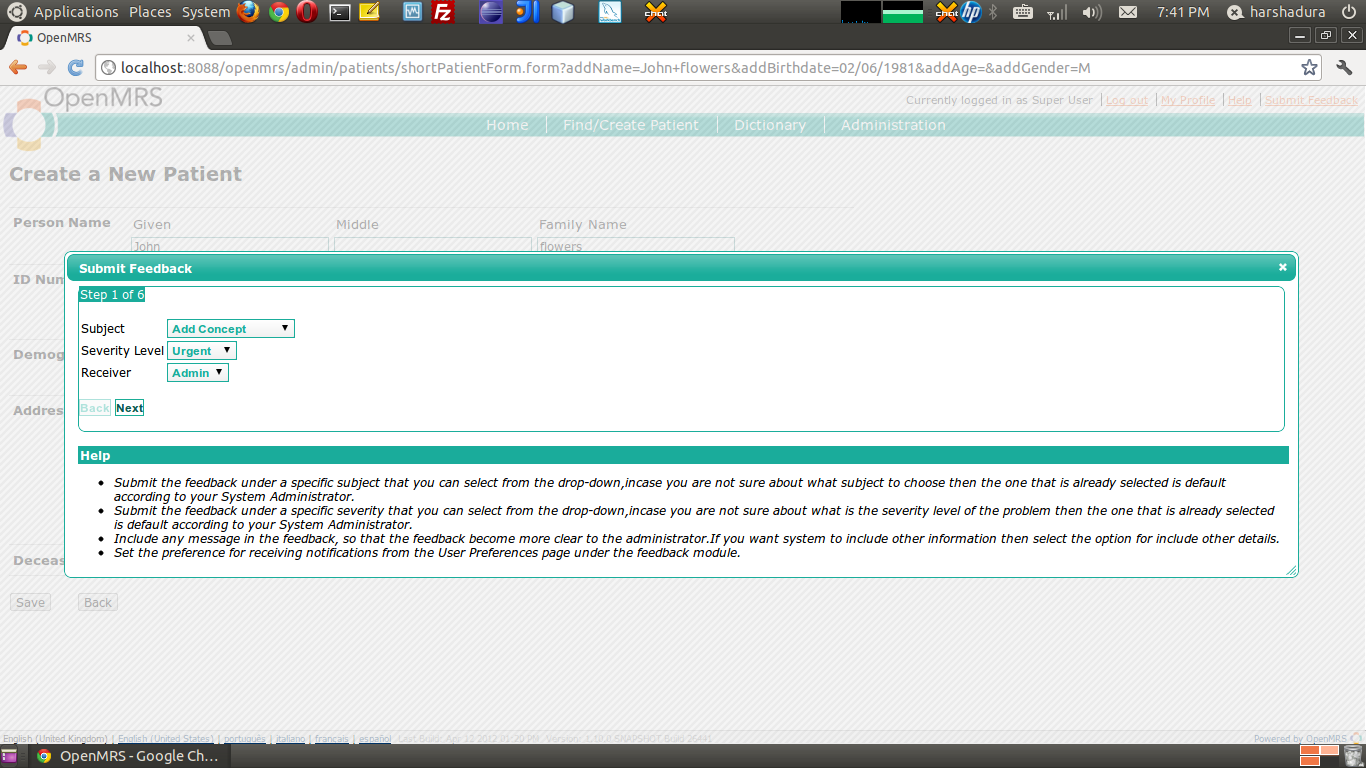
STEP 1 - Brief information about the feedback : mention Subject, Severity level and Receiver
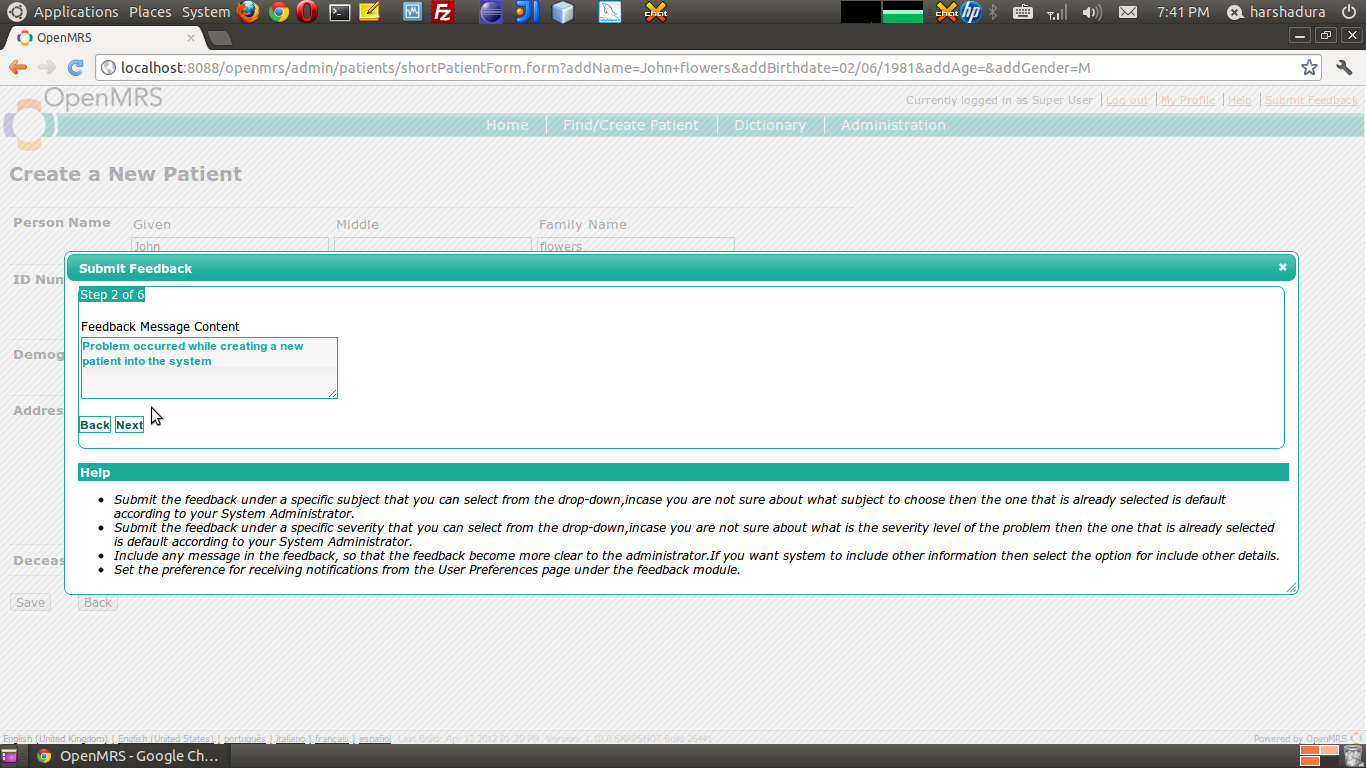
STEP 2 : User can describe the problem/feedback
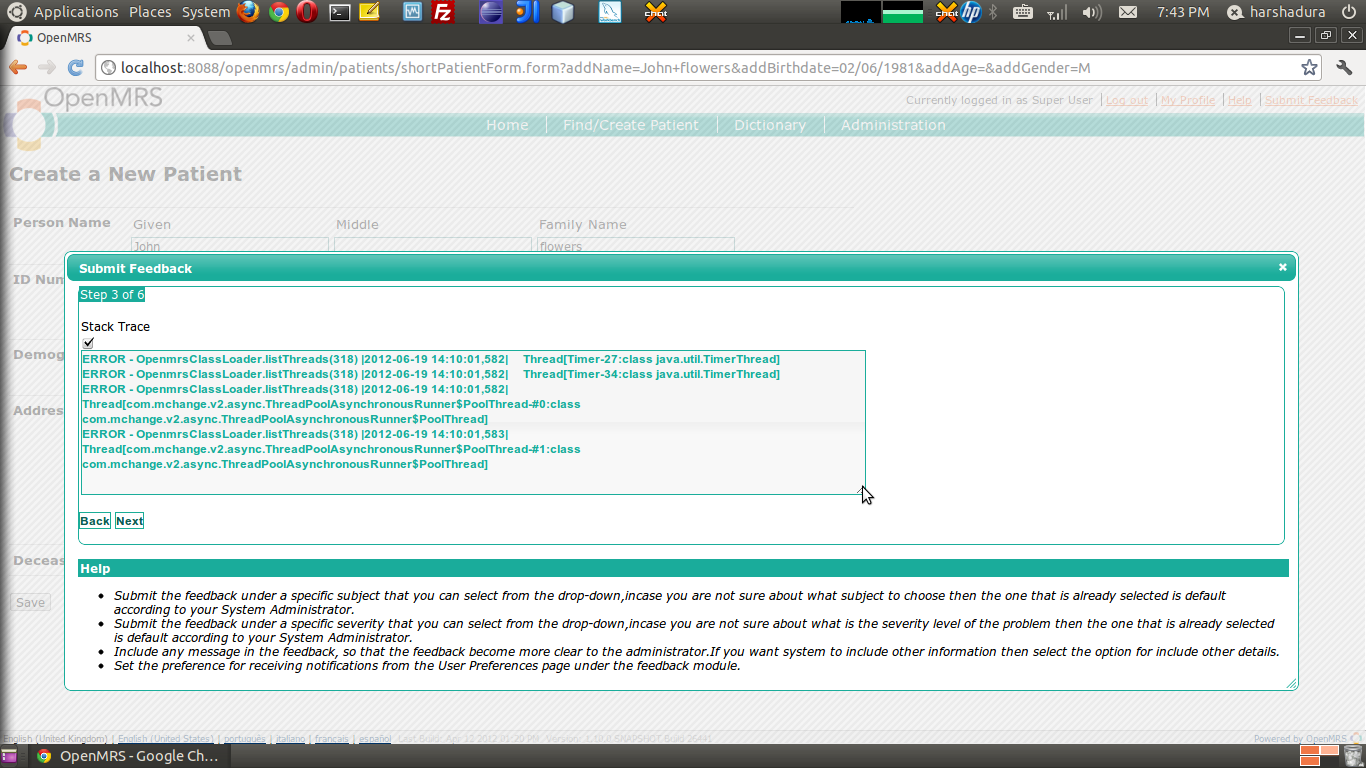
STEP 3 : User can paste the Server log or error stack trace if available
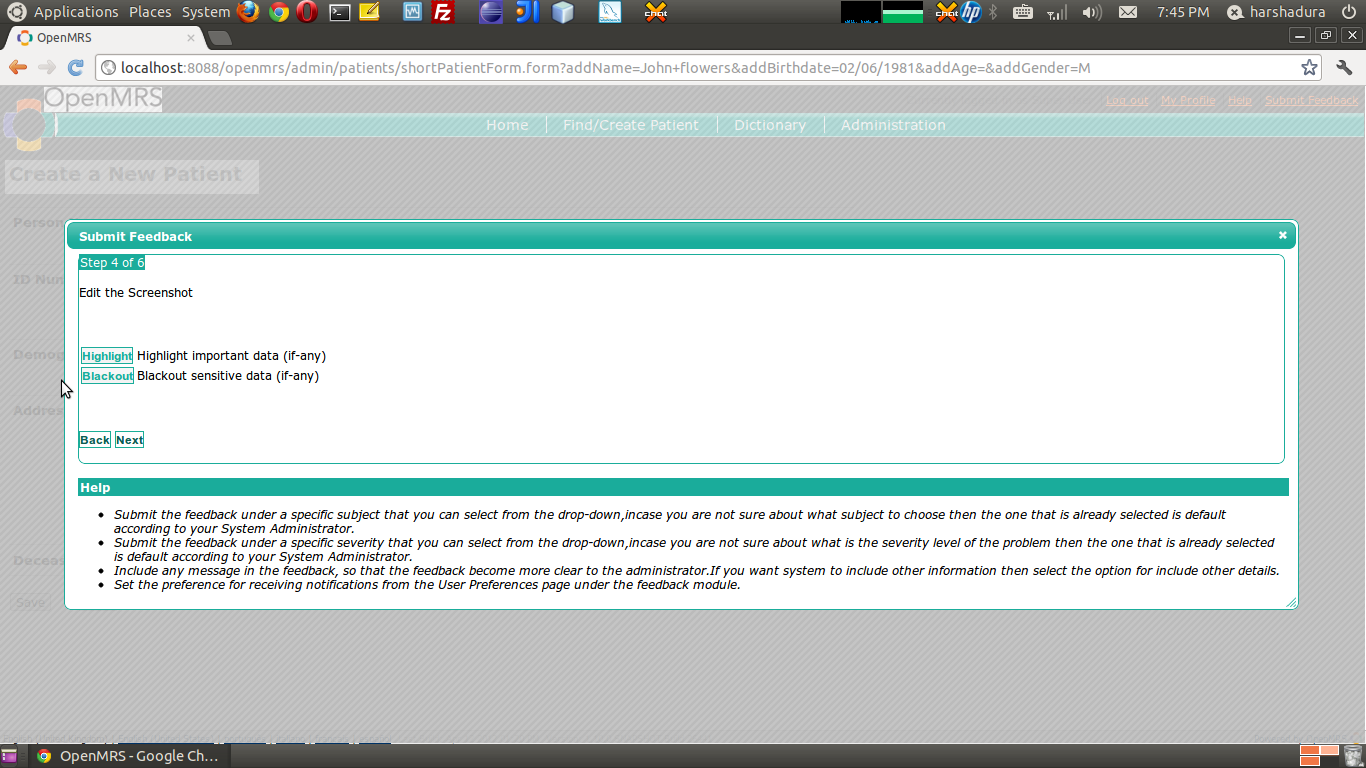
STEP 4 : Auto Capture Screenshot + let the user to edit (Highlight/Blackout) it within Web browser
If your feedback is something related to a problem occurred when using OpenMRS, then you might to need to attach the screen shot of that error prone page, so previously you had to take a screenshot of the screen and edit if there are sensitive data on that image using Image editing tool, and then you upload it to the feedback form, well in this new release of feedback module you have just need to do nothing of those annoying steps.
In next step you can are ready to highlight or blackout your screenshot as needed.
...
After doing all the highlight markings you need to click the "Submit Feedback" button again, then it will pop-up the wizard again at your current step.
...
You might need to hide any sensitive data like (eg: patient name, address) on from the snapshot. Blackout is designed for that, So you can just use it to blackout and hide them. The Blackout functionality is same as the highlight markup, you can use mouse to blackout, if you need to remove any mistakenly placed blackout then you just have to click over them, it will disappear.
...
Okay now we highlight and blacked out some sections in our snapshot, so ready to go ahead, if you need to go back or highlight/black out another section you still have the chance to do it. After all is done, hit Next
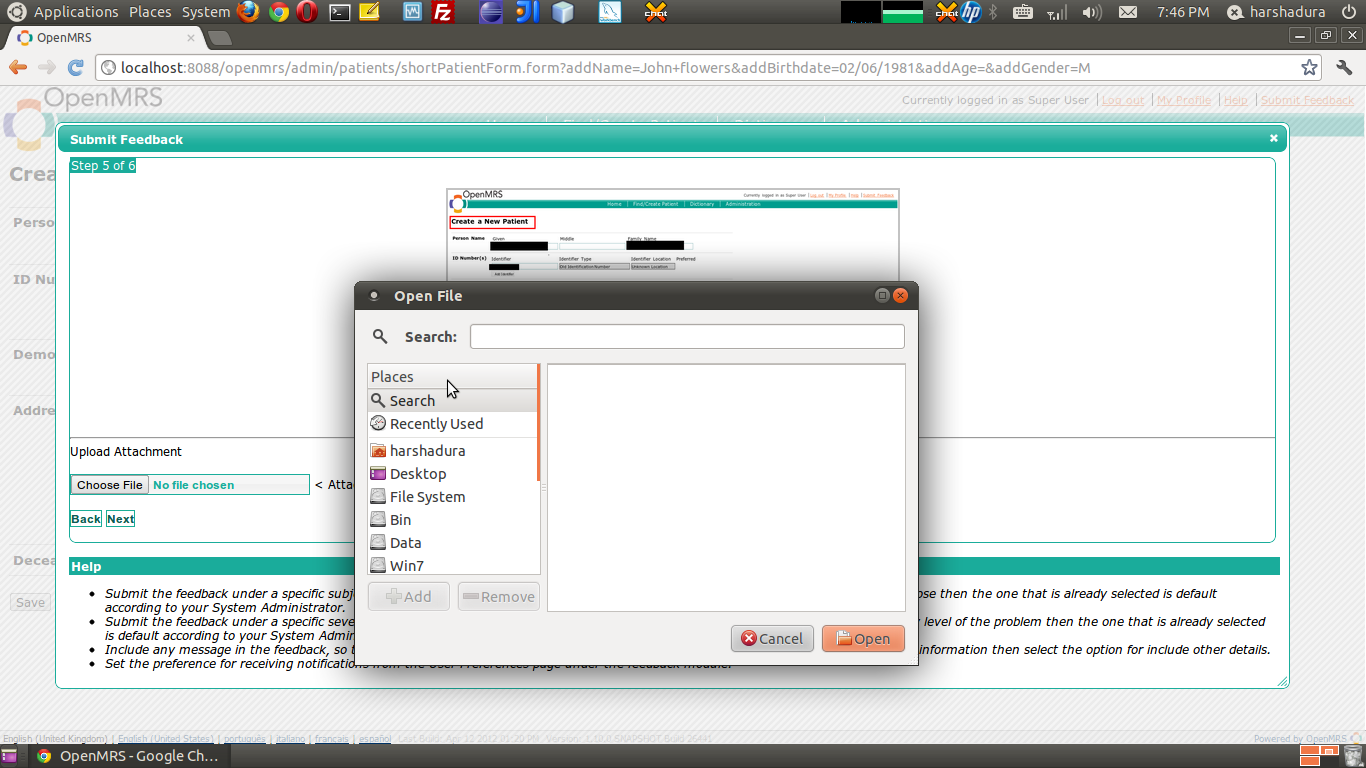
STEP 5 : Preview of the Rendered screenshot + Attach if any related documents.
In this step you will see the rendered screen shot image after all your editions. this step might take a moment to render the image and preview.
...
Sometimes you may need to attach any important documents you may have (like Server logs, images or other resources) which can be helpful to prove your feedback, so you can add them here.
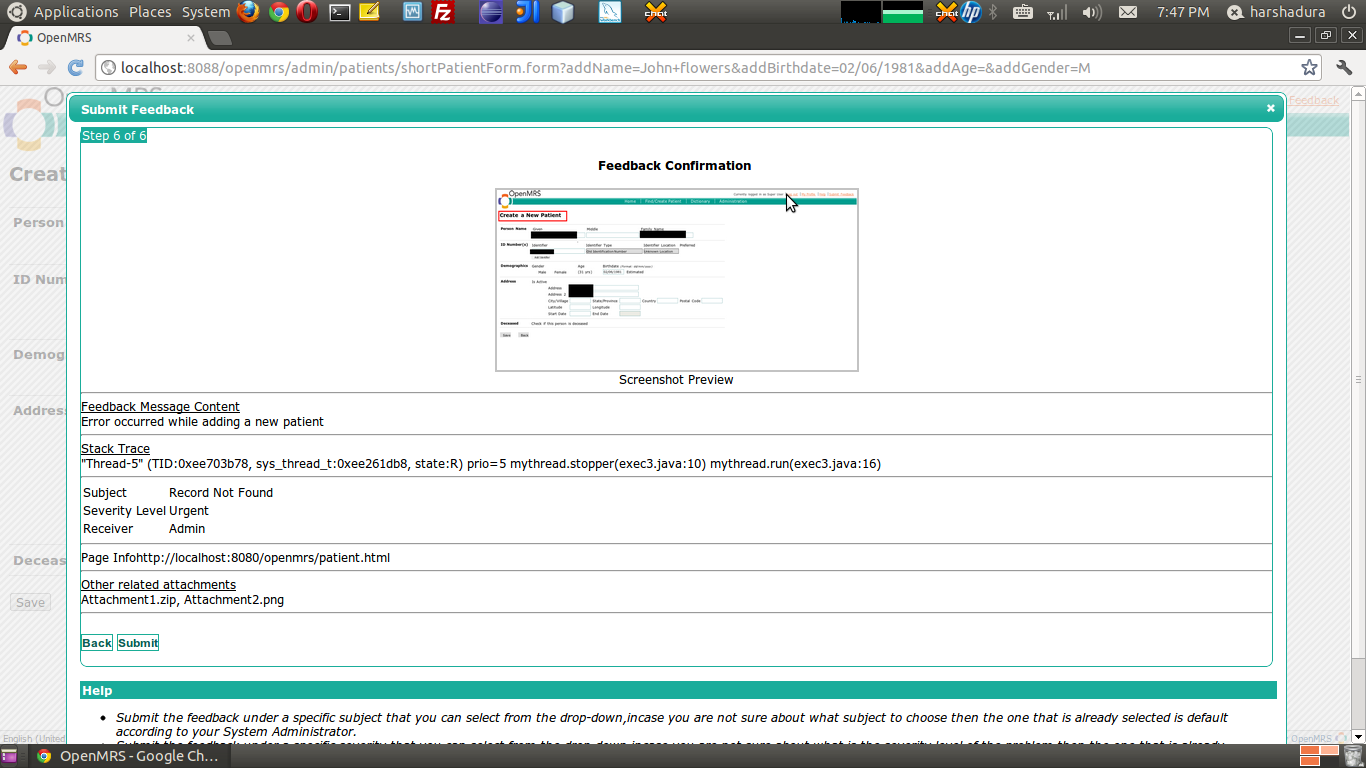
STEP 6 : Final Summary of the Feedback and Submission.
Okay, now you saw the final preview of the edited screenshot, attached docs if you got, now its the time to submit. In this step you will see the Summary of your Feedback. Take a moment and recheck if all are okay. After then you can submit your Feedback form.
