This is the user guide for OpenMRS-iOS. If you're looking for the development guide, it's over here.
Requirements
- This app is built for iOS 7 and above
- This app cannot work as a standalone solution. You must have a working OpenMRS installation that you can visit through your web browser to use this app.
Logging in
After building or downloading the app, you will see a login screen:
Host: The URL of your OpenMRS installation. Note that the app requires the URL that you would visit in a web browser to log in; demo.openmrs.org/openmrs will work, but demo.openmrs.org will not.
Username: The username that you use to login to OpenMRS
Password: The password that you use to login to OpenMRS
Main Menu
After successfully logging in, you will see a main menu:
Patient Search: This opens a window where you can search for existing patients.
Add Patient: This opens a window allowing you to add a new patient to OpenMRS.
Settings: This opens a window where you can logout of OpenMRS on your device. Logging out also destroys any saved patients on your device.
Adding a patient
By tapping the add patient button on the main menu, you can add a patient to the OpenMRS database:
Note that when specifying an identifier, you must manually enter the identifier. The app currently does not support automatically generated identifiers.
Patient Search
Clicking Patient Search in the main menu will bring you to a table view with a search box. Type your search into the box, and the list will update in real-time with matches:
Patients appear in an Identifier - Patient Name format. Tapping on one of the results will open a view with more information about the patient selected.
If you have saved patients for offline use, they will appear in the list even if you are not connected to the Internet.
Viewing a patient
When you select a patient, you will see a screen with information about the patient:
Tapping the Actions... button will expand to show actions that can be taken on the patient:
- Add Visit Note: This button will show a view where you can add a visit note to the current patient's record.
- Capture Vitals: This button will show a view where you can record a patient's vitals into the OpenMRS system.
- Save for Offline Use: This button will sync all information about a patient to an encrypted database on your local device. When you aren't connected to the Internet, you will still be able to view information about the patient. If the patient is already saved, this button will update the patient with the most recent data from OpenMRS.
Selected the visits or encounters rows will show a list of visits or encounters. Tapping one of the items in the Encounters list will show a list of details about the encounter.
Adding Visit Notes:
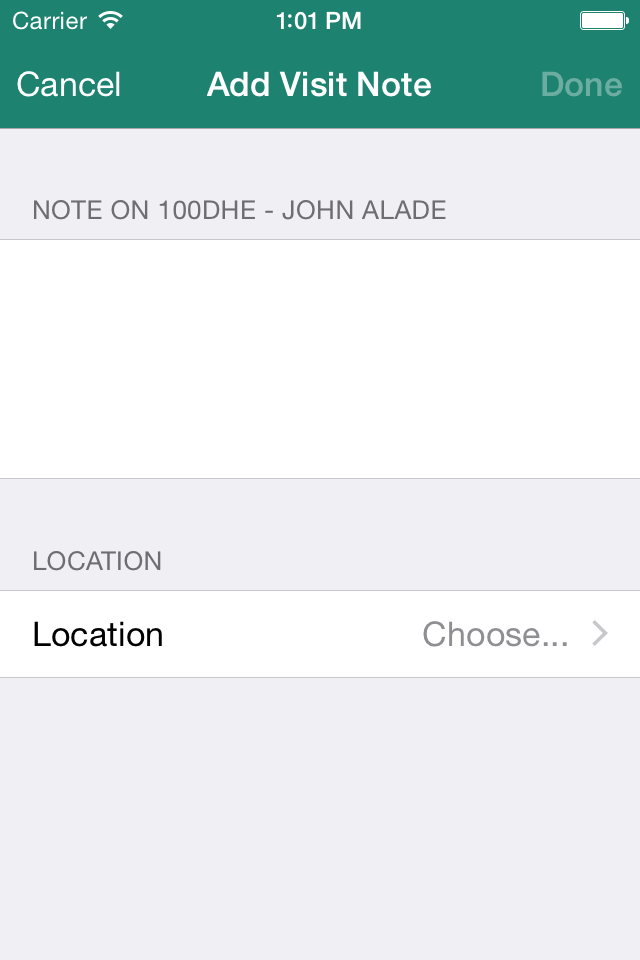
Tapping the add visit note... button on a patient view will show a page where you can type in a note:
Note that you must choose a location before submitting the note.
Capturing patient vitals
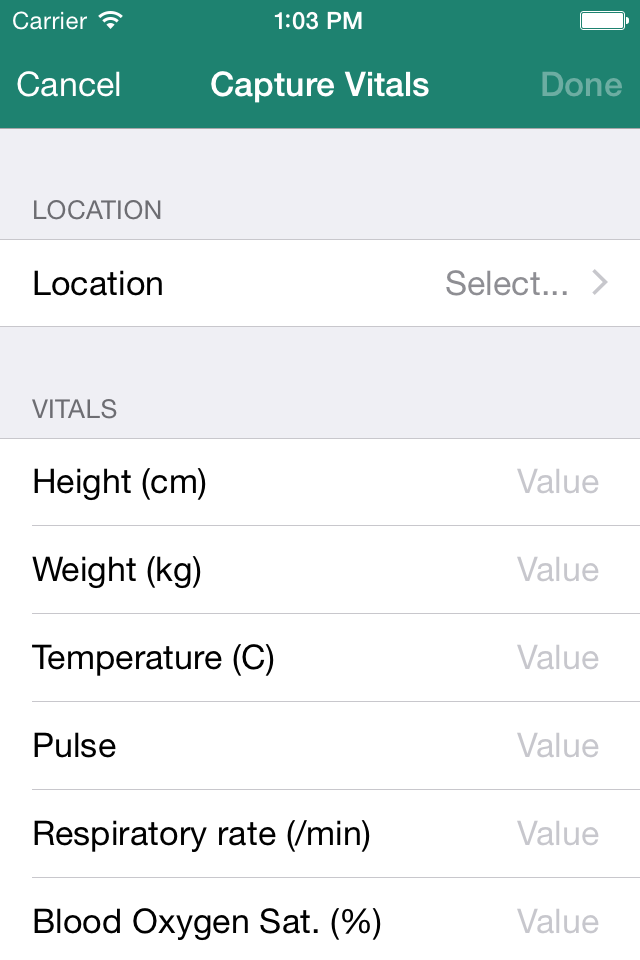
Tapping the capture vitals button on a patient view will show a screen where you can record a patient's vitals:
Note that you must choose a location before submitting the vitals. Also, you do not need to include units of measure when entering the values.


