OpenMRS code follows a specific format. To set up Eclipse properly, so that your code can be formatted automatically, follow the instructions below.
Download and Install Eclipse
- Download Eclipse from http://www.eclipse.org/downloads/.
We recommend the Eclipse IDE for Java EE Developers. - Install Eclipse on your system.
Clone openmrs-core
To configure code format in Eclipse, you will need xml files in the openmrs-core repository.
To get these files, follow these steps:
- Sign in to your Github account.
- Go to: https://github.com/openmrs/openmrs-core, fork the repository.
Run the following command on your computer:
$ git clone https://github.com/{your_github_id}/openmrs-coreThe openmrs-core folder with all its files will be cloned to your local directory.
Configure Eclipse
Configure Java Code Format for OpenMRS
In order for Eclipse to format the code, you will need to import the OpenMRSFormatter.xml. This file is located in the OpenMRS core, which you should clone if you haven't already.
- Open Eclipse, select Window > Preferences.
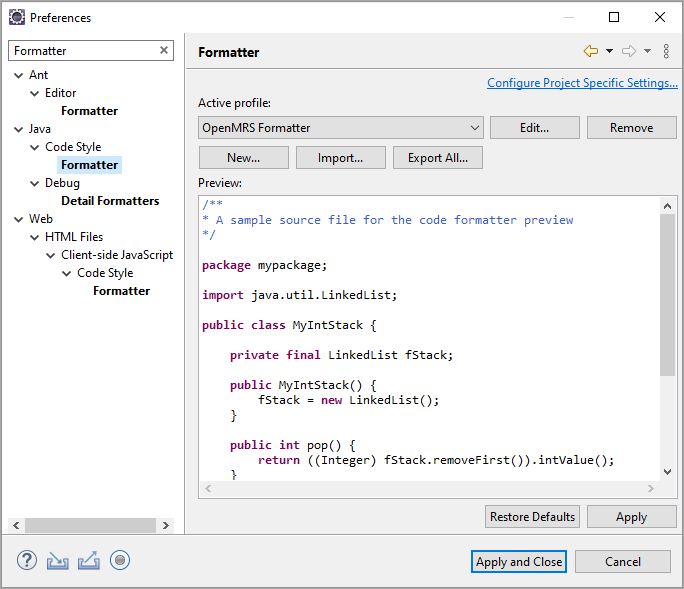
- In the search box, enter formatter, then select Java > Code Style > Formatter.
- In the left pane, select Import.
An Import Profile dialog displays. - In the dialog, browse to: openmrs-core/tools/src/main/resources/eclipse, and select OpenMRSFormatter.xml.
- Select Open.
The OpenMRS Formatter shows as the Active profile. See the picture below: - Select Apply and Close.
Now you can let Eclipse format any java class with the shortcut:
Ctrl+Shift+F (Command+Shift+F on Mac)
Configure Java Import Order
In order for Eclipse to order the java imports according to the OpenMRS style and remove unused imports do the following:
- Select Window > Preferences. In the search box enter organize imports.
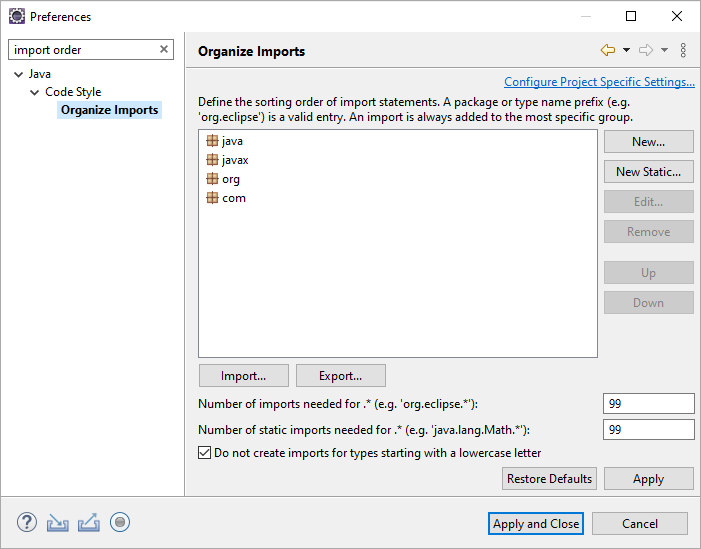
- Select Java > Code Style > Organize Imports.
The result is as following: - Make sure the order of the import groups is as what you see above (java, javax, org, com).
It is the Eclipse default, so you might not have to change anything. - Check both Number of imports needed for * and Number of static imports needed for * are set to 99.
The numbers need to be high enough so that Eclipse will not replace your imports with the so called "star imports" using *. 99 is the default value for Eclipse and is usually high enough. - Select the Do not create imports for types starting with a lowercase letter checkbox.
Select Apply and Close.
Now you can let Eclipse format and remove unused imports with the shortcut:
Ctrl+Shift+O (Command+Shift+O on Mac)

