Quick Overview
- Modules can be managed through the web application. While modules can be stopped, started, upgraded, removed, etc. without restarting the server, note that each time an action is taken on a module, the OpenMRS context is restarted — i.e., actions taken on modules (starting, stopping, upgrading, removing) will interrupt any active processes. For example, if Module A is listening on a port for messages and you start or stop Module B, Module A will be briefly interrupted as the change is applied.
- The file extension for OpenMRS modules is ".omod".
A module can be loaded into OpenMRS by one of two methods:
Dropping the .omod file into the defined module repository folder (the module repository folder is defined by the system's runtime settings).
Navigate into the modules folder located in your OpenMRS server folder. Place the .omod file into this folder. The module will be installed and usable the next time the web application is restarted.
Uploading the module via the form on Manage Modules administration page in the web application.
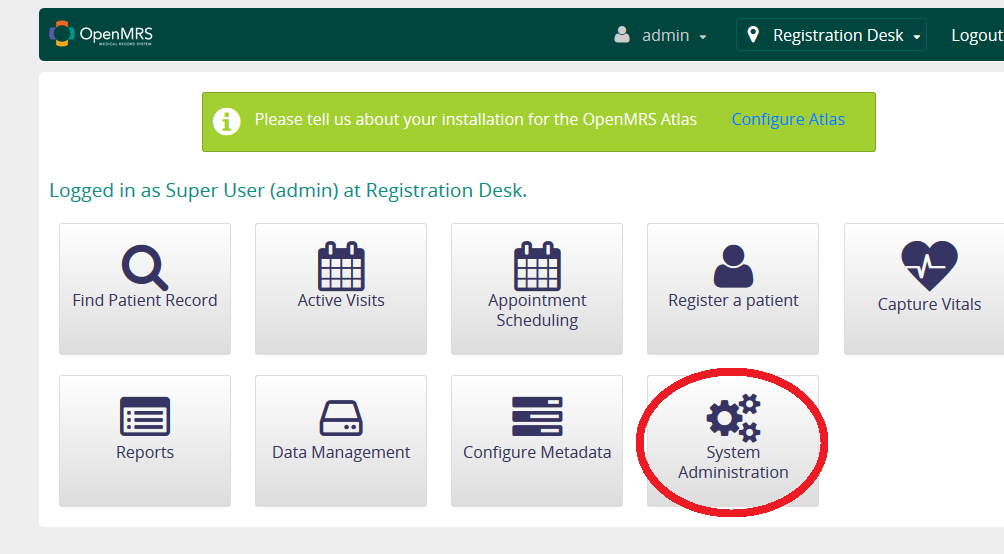
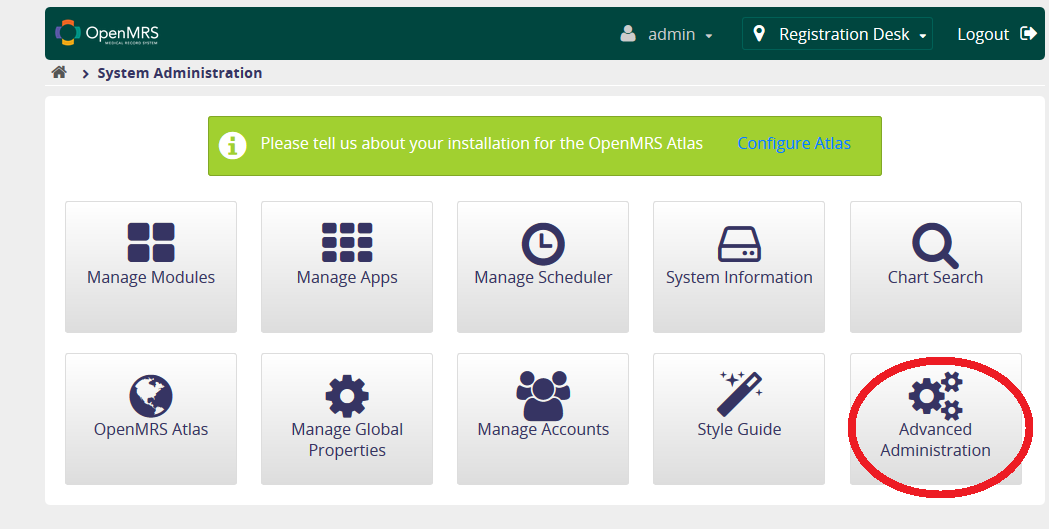
Navigate to the home page of OpenMRS then click on System Administration. Then click on Advanced Administration.
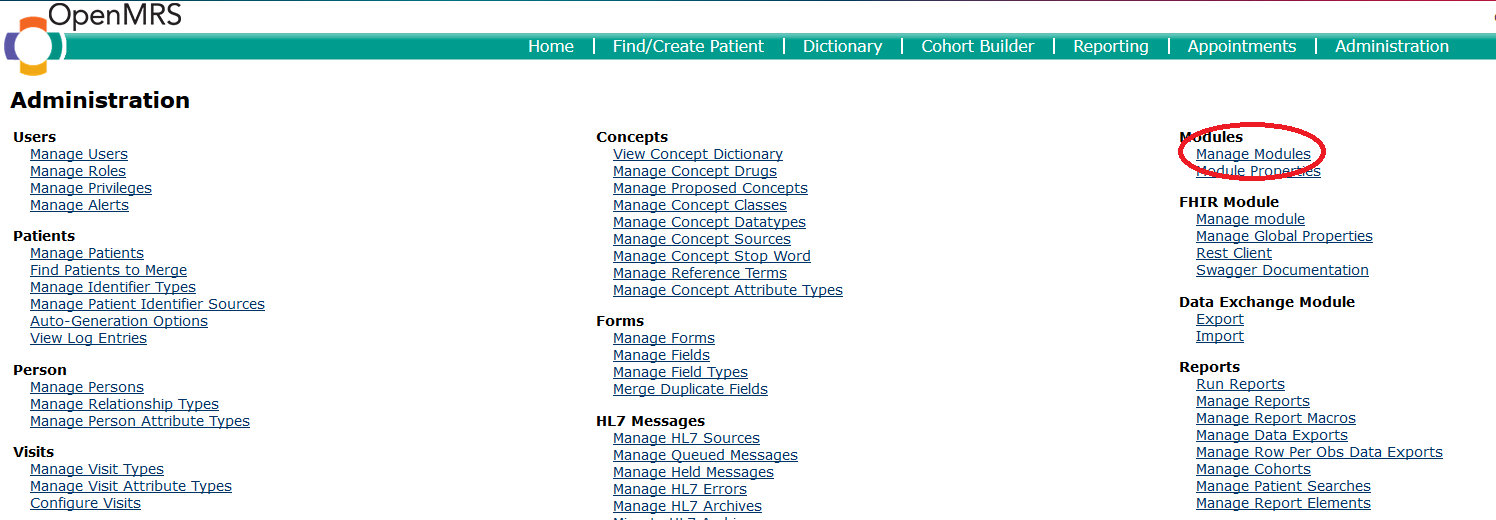
This will bring you to the Administration page. Click on Manage Modules under the Modules section.
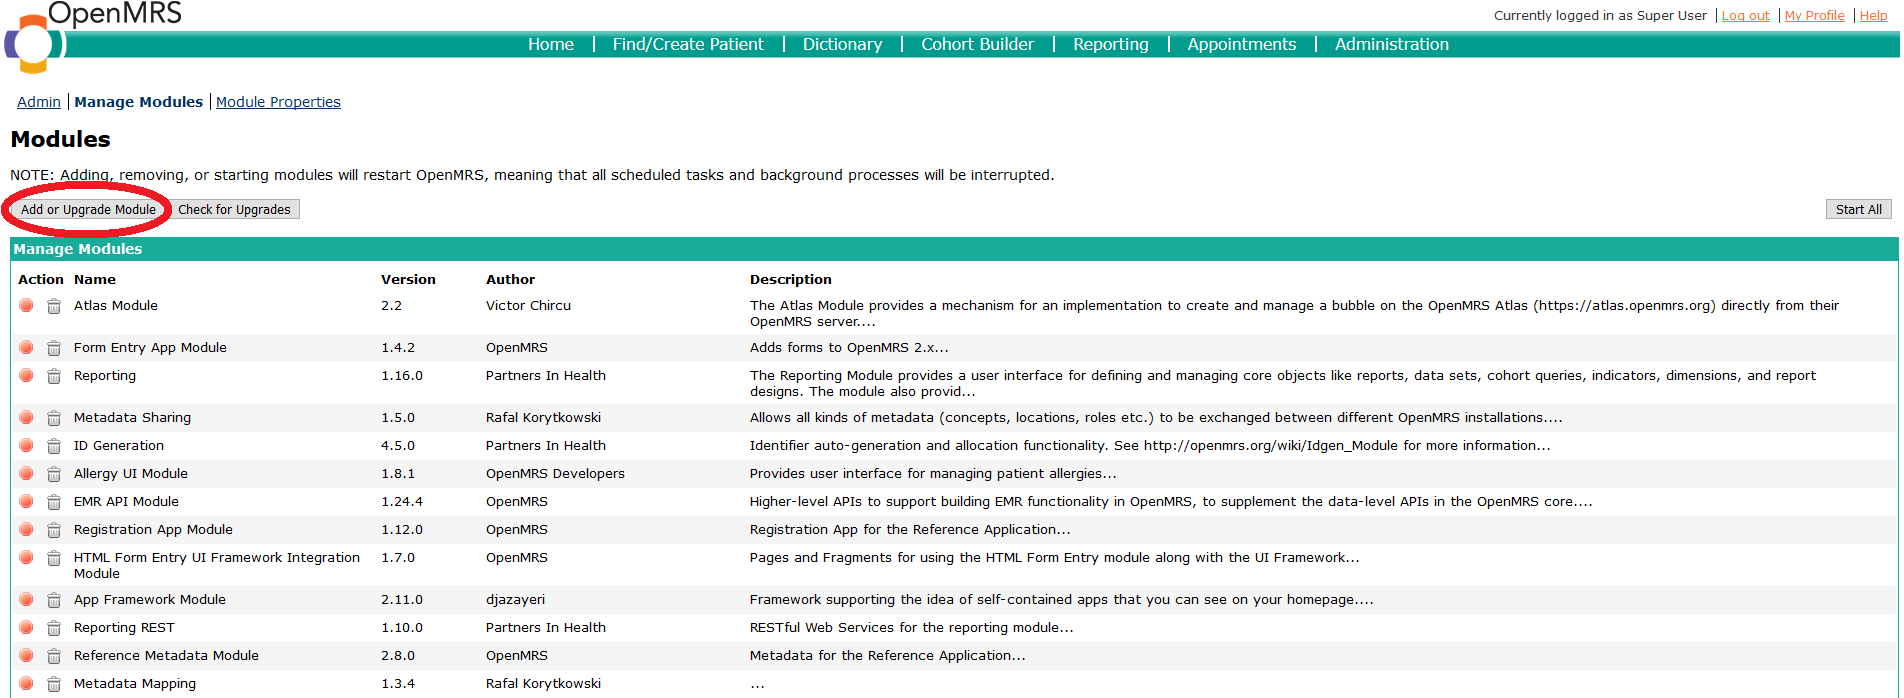
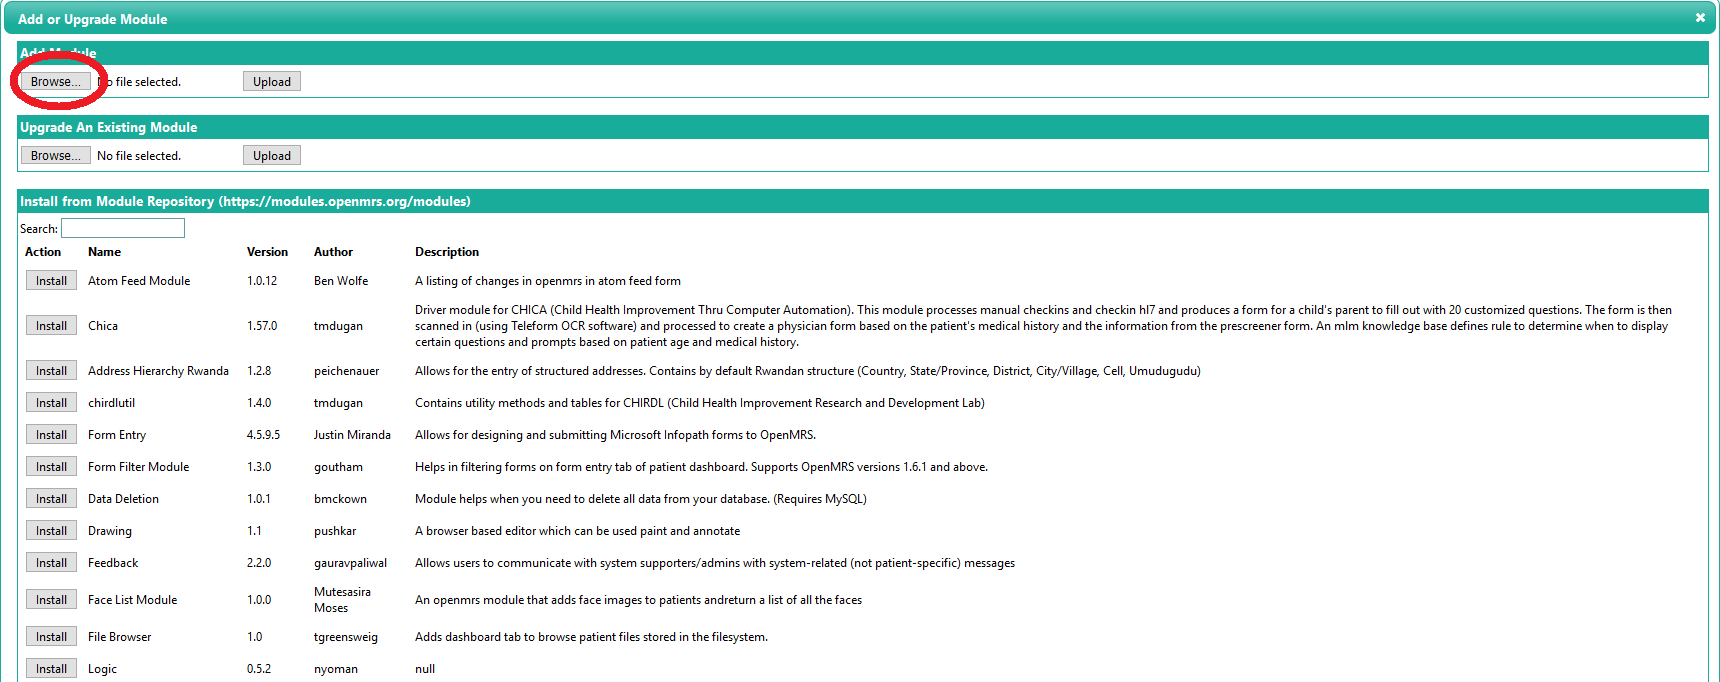
Click on Add or Upgrade Modules. Click on Browse to pull up a file explorer to add a module. After selecting your module, click Upload.
Installing of modules through the web interface is disabled by default (for security purposes). To enable it, set the 'module.allow_web_admin' runtime property to <tt>true</tt> and restart the web application.*BE CERTAIN THAT YOU HAVE CHANGED THE DEFAULT ADMIN PASSWORD BEFORE ALLOWING MODULE UPDATES VIA THE WEB; OTHERWISE, ANYONE COULD UPLOAD AND RUN CODE ON YOUR SERVER
- Find and download more modules from the OpenMRS Add-ons index.
Individual module documentation can be found at the Module Documentation page.
Developers can find more information about writing modules on the module development page.


