Install and Configure IntelliJ for OpenMRS Development
- rain bow
OpenMRS code follows specific format. There is also a OpenMRS live template to help you save some typing effort. To take advantage of auto formatting and openmrs code templates, you need to follow the instructions below to configure IntelliJ.
Download and install IntelliJ
To download and install IntelliJ, follow these instructions:
- If you are using Windows system, download IntelliJ from https://www.jetbrains.com/idea/
We use the Community Edition 2020.2.1 in this guide. - Install IntelliJ.
- On your Windows system, click ideaIC-2020.2.1.exe to install.
On your Linux system, run the following command:
$ sudo snap install intellij-idea-community --classic
- Edit the file {idea_install_dir}/bin/idea.vmoptions
If you have 3GB RAM, the suggested JVM startup parameters are:
-Xms64m
-Xmx1024m
-XX:MaxPermSize=400m
-ea
Clone openmrs-core
To configure code format in IntelliJ, you will need two xml files in the openmrs-core repository. To get these two files, you need to clone openmrs-core repository to your local drive.
- Sign in to your Github account.
- Go to: https://github.com/openmrs/openmrs-core, fork the repository.
Run the following command on your computer:
$ git clone https://github.com/{your_github_id}/openmrs-core
Configure IntelliJ for OpenMRS
Configure Eclipse OpenMRS Code Formatter
- To install the Eclipse Code Formatter plugin in intelliJ, select Files > Settings.
- In the search box enter eclipse code formatter, and select Install.
When the installation is complete, select Restart IDE. - Select Files > Settings, in the search box enter “Eclipse Code Formatter”.
- Select Use the Eclipse Code Formatter.
- Select Eclipse workspace/project folder or config file, and browse to your openmrs-core folder:
/openmrs-core/tools/src/main/resources/eclipse/OpenMRSFormatter.xml - Unselect Optimizing Imports. Keep everything else to default.
The screen should look like this:
- Select OK to apply the changes.
From now on you can let IntelliJ format any java class for you. See IntelliJ - Reformatting Source Code for details.
Define Java Import Order
In order for IntelliJ to order the java imports according to the OpenMRS style and remove unused imports do the following:
- Select File > Settings. In the search box enter code style.
- Select Code Style > Java.
- As shown in the screenshot, select the settings icon and select Import Scheme > Eclipse XML Profile.
Note: We are using the Eclipse XML Profile NOT IntelliJ's!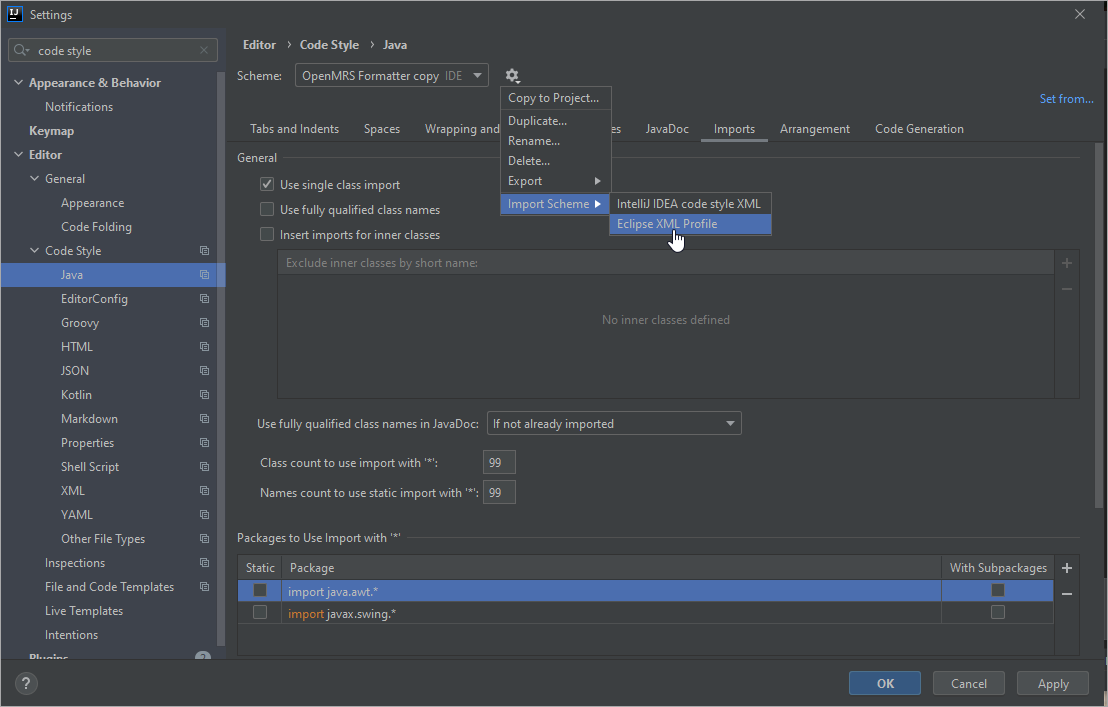
- Browse to \openmrs-core\tools\src\main\resources\eclipse, select OpenMRSFormatter.xml.
- Select the Imports tab. Make sure all the settings are as the screenshot.
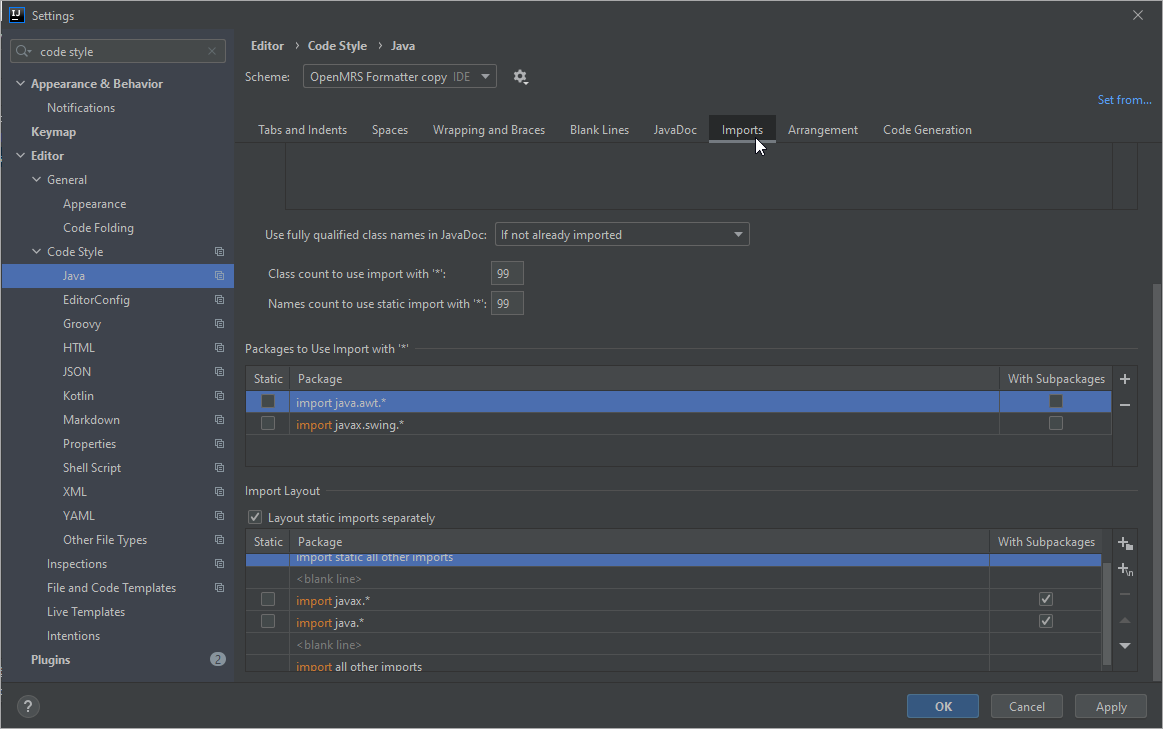
- Set both Class count to use import with * and Names count to use static import with * to a high enough number like 99.
Without this step, IntelliJ will replace your imports with so called "star imports" using * which we do not want. Change the Import Layout to match the configuration as shown, so that the order of packages is as the following:
Import static all other imports
<blank line>,
import javax.*,
import java.*,
<blank line>
import all other imports.
From now on you can let IntelliJ format and remove unused imports in any java class for you. Read IntelliJ - Optimize Imports.Note: Please apply this command to clean up your imports before you create a pull request on Github since the imports are not cleaned up by the maven formatter plugin when you run the build command !
Configure XML Code Format
The OpenMRSFormatter.xml only handles the Java formatting (limitation of Eclipse), you also need to configure the XML Editor.
- Select File > Settings. In the search box, enter xml.
- Select Editor > Code Style > XML
- Select the Tabs and Indents tab, select the Use tab character checkbox.
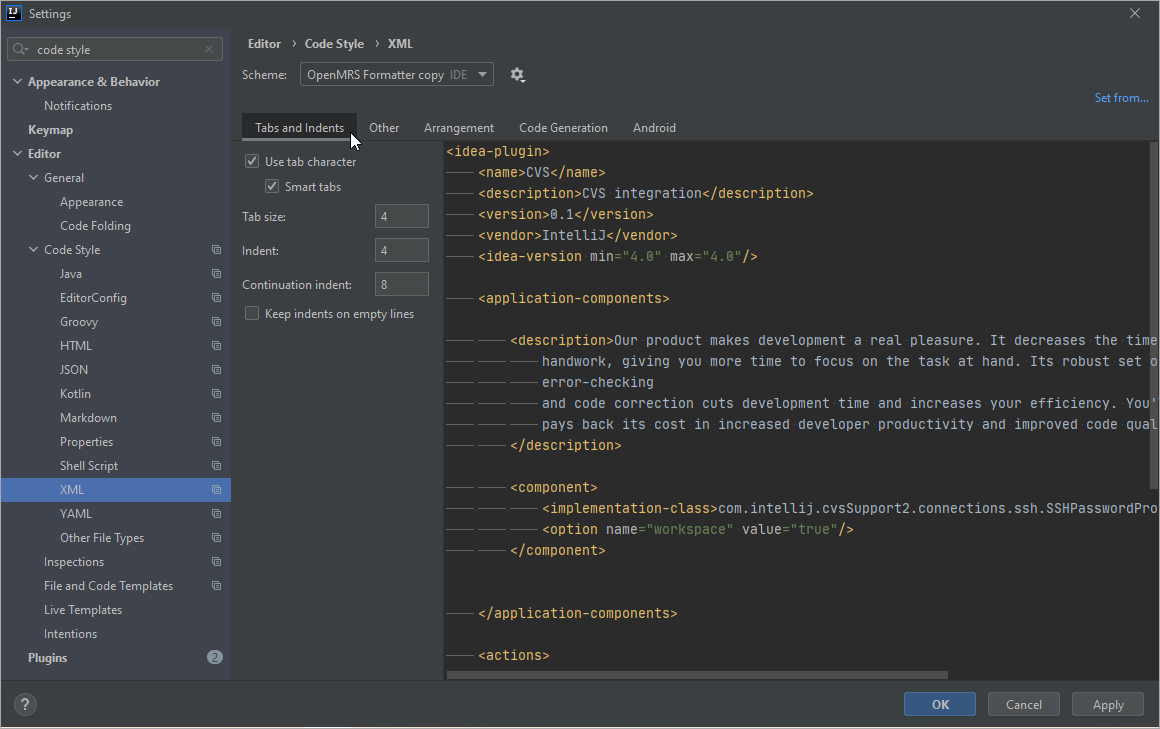
- Select the Other tab, set the Hard wrap at to 125 columns.
This is the maximum line length we choose for XML, which is equal to the one we set for Java files. For Java this is ensured by the Checkstyle - LineLength so please update this number here if the openmrs-core/checkstyle.xml setting changes.
Set Up OpenMRS Live Templates
To save you some typing and focus on solving problems, we put together a few code snippets/templates, which are called Live Templates in IntelliJ. Once you imported them, you can type short keywords and IntelliJ inserts the appropriate template code with some variables automatically. You can then adjust the snippet to your use case.
- To import the templates copy the openmrs-core/tools/src/main/resources/intellij/templates.xml file to configuration directory/templates.
- Restart IntelliJ, select File > Settings and enter templates in the search box.
- Select Editor > Code Style > Live Templates.
On the left pane, OpenMRS displays as one of the live template groups.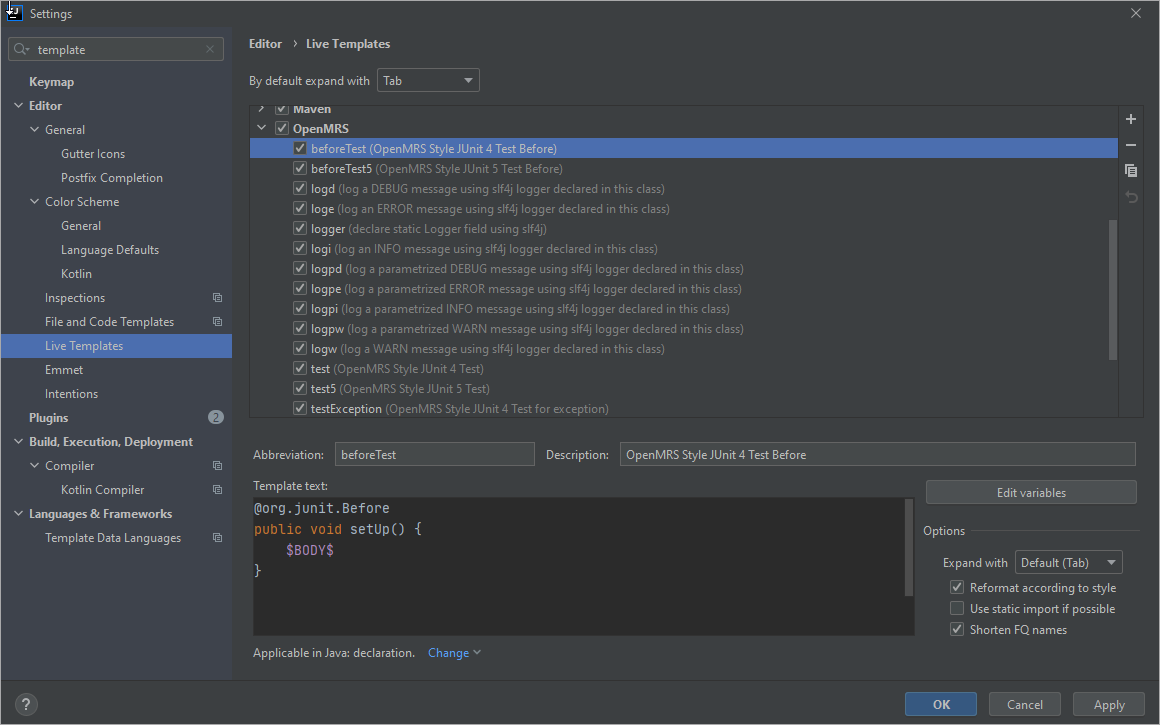
When you select OpenMRS, all the templates belong to this group display. You can easily see the definition of each template and enable/disable the templates.
You can also get the names of all snippets by executing the following:
On Linux:
cat tools/src/main/resources/intellij/templates.xml | grep "template name"
On Windows:
openmrs-core\tools\src\main\resources\intellij\templates.xml | find “template name”
Now you’ve completed the configuration of IntelliJ. To learn more about IntelliJ go to How to Set up and Use IntelliJ.